1. Using the Audio Control function and KNX
If you want direct audio control without using the trivum WebUI,
go into the Gira Project Assistant, and pull an element "Audio control" into your project.
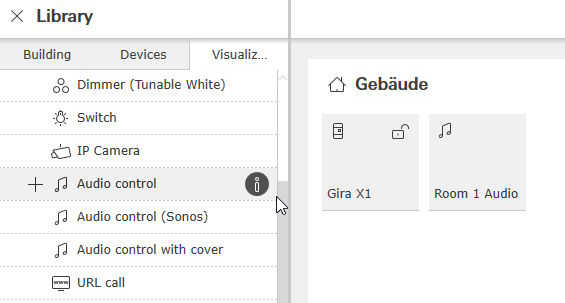
You need one element per Room, so name the first one "Room 1 Audio".
1.1. Define and link KNX group addresses to control audio in this room
This is a table with example group addresses. Adjust them as you like.
function |
send address |
read address |
data type |
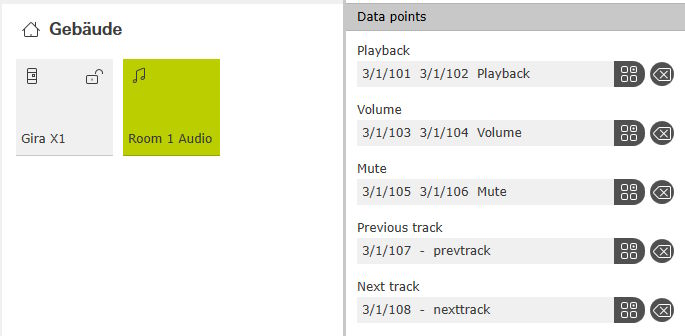
Playback |
"3/1/101" |
"3/1/102" |
1 bit |
Volume |
"3/1/103", configure data type: 5.001 |
"3/1/104" |
8 bit |
Mute |
"3/1/105" |
"3/1/106" |
1 bit |
Previous track |
"3/1/107" |
- |
1 bit |
Next track |
"3/1/108" |
- |
1 bit |
Previous playlist |
"3/1/109", initial value default "0", keep value |
- |
1 bit |
Next playlist |
"3/1/109", initial value default "1", keep value |
- |
1 bit |
1.2. Define KNX group addresses to display status sent by trivum.
Fill in only 'read address':
Track |
- |
"3/1/111", configure data type: 16.001 |
14-bytes text |
Album |
- |
"3/1/112", configure data type: 16.001 |
14-bytes text |
Artist |
- |
"3/1/113", configure data type: 16.001 |
14-bytes text |
Name of playlist |
- |
"3/1/114", configure data type: 16.001 |
14-bytes text |
Note: field "Playlist" (without name) is unused, and kept empty.
1.3. Enter the web setup of the trivum device.
Go into:
configuration / zones / first zone / KNX bindings
1.3.1. fill in the control fields
function |
trivum field |
value |
Playback |
Zone on/off |
"3/1/101" |
Mute |
Zone or group mute |
"3/1/105" |
Volume |
Zone or group volume |
"3/1/103" |
Previous/Next playlist |
Play next source |
"3/1/109" |
Next track |
Key '>' |
"3/1/108" |
Previous track |
Key '<' |
"3/1/107" |
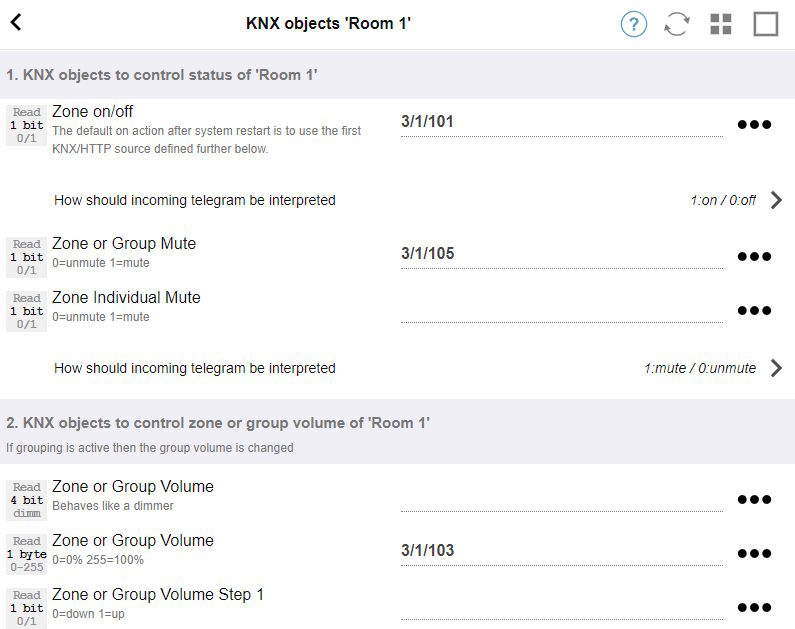
1.3.2. fill in the numeric status fields
function |
trivum field |
value |
Playback |
Send status |
"3/1/102" |
Mute |
Send zone or group mute |
"3/1/106" |
Volume |
Send volume |
"3/1/104" |
1.3.3. configure text status fields
to do so, go to:
automation / knx / displays / add display
-
change assigned zone: first zone
-
change display type: display with 4 lines
Settings for the lines:
line |
group address |
content when streaming is active |
1 |
"3/1/111" |
Title of track |
2 |
"3/1/112" |
Album of track |
3 |
"3/1/113" |
Artist of track |
4 |
"3/1/114" |
Current streaming service/source |
1.3.4. configure the zone to react to Next/Previous playlist
go into "Define the KNX/HTTP source list". Fill in several actions, like
-
play a web radio station favorite
-
play a playlist favorite
-
play a line input
When this is done, the field "Play next source" will toggle between these sources.
1.3.5. Setup KNX communication
if you have no KNX IP router, you can connect from trivum directly to Gira X1 as IP interface.
1.4. Go back to the Gira Project Assistant
and commision your project to the X1.
1.5. Run the Gira Smart Home App
You will find the new function in the overview:

Select it to get the detail view:
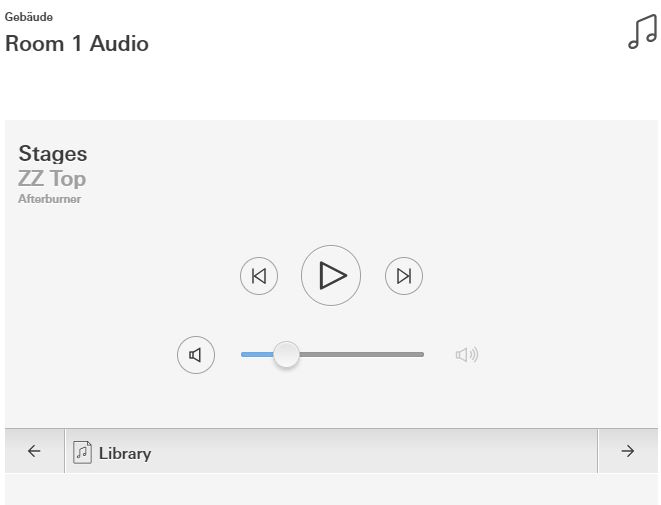
Now you can:
-
press Play/Pause in the middle to switch the zone on or off
-
if a NAS album or playlist is playing, skip to previous or next track by the buttons next to that
-
toggle through the zone sources with the arrows ← and → at the bottom.
Note that directly after a restart of the trivum device, just switching the zone on may not play sound, as no music is selected. You then have to touch "→" once, to select a zone source.
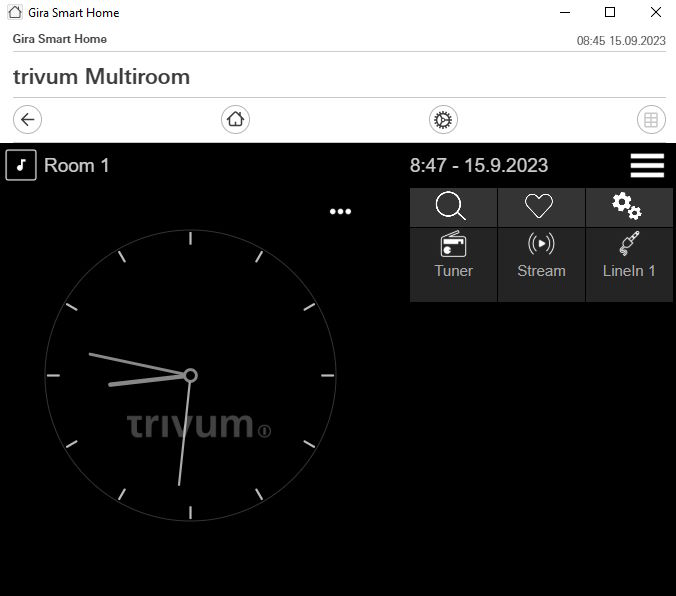
2. Using an URL call to a trivum music server WebUI
This is the fastest way to get full music control over all zones.
In the Gira Project Assistant, drag "URL call" into your project.
Under Name, type for example "trivum Multiroom".
Under Parameter / URL, enter http://trivumip, e.g. http://192.168.178.100
Then open the Gira Smart Home App. Enter the new URL call object, and you find the trivum WebUI.
.